Monday, August 27, 2007

Year 2 - Day 215


Insulation is done. No more prickly wrists.


A very exciting week is coming up: cabinets are on the truck! Appliances are being shipped to the retailer. Finished the plumbing and the insulation this past weekend. Bob was a superstar on the plumbing - we cut the holes for the pipe just a tad low in the stud (my error I believe - didn't think about the drop we needed) and he hand filed and chiselled it to the correct height so that we had a nice drop on the pipe. Temptation was to not do the whole job but I kept saying to him "think of your blocked up sink and think how 30 minutes more now will save all that smelly bother". And on (and on) he filed. Bless him.

I finished the insulation. So this morning I am waiting for the building inspector and hoping he'll give us the sign-off to sheetrock. Called the sheetrock guy (via his friend as his English is not good enough to understand on the phone) and he is coming over again for a last look as we will need to use 3/4 " sheetrock on some walls to match up to the old plasterwork and then 1/2" on the walls that are totally new.

I think I'll be taking a few days off this week to lay the hardwood floor so as to keep things moving along. Still a ways to go but quite exciting as everything is really coming together and we can see the end in sight: the list of to do's for this room is getting much shorter! The pile of tools that we have amassed doing it is getting taller!

Also called another guy to give a quote on installing the cabinets. I'd like to give it a try but we have a slightly tricky boxing in / fake door situation to cover up the vents in the corner and I think by the time we get to that stage of things we might be more than happy to pay someone to do it and get it done efficiently. Current quote is $3600 - how can installing cabinets cost so much? They'll help install appliances so we won't have to incur that (which BTW is also another big gouge - $125 to install a D/W?) but I'd like to get it down a little if possible.

We've had some good price karma recently: the Samsung French Door fridge arrived from Lowes. We had bought it when they had a $150 gift card rebate so that saved us some $$. Then when it arrived there were some tiny scuffs on the door. We tried to buff them out but they were not budging. They are sort of those imperceptable yet you know they are there things. So we called Lowes and they said "well either send it back or we'll give you 15% off". 15% = $270. For that we could live with it so we got the fridge at $420 (23%) off retail.

Then we happened to be shopping for shelving for the FR and ran across some rugs on sale in Pottery Barn. I usually can't afford them but the colors on this rug worked and it was on sale reduced from $479 to $299 for an all-wool 5' x 8' rug. Bought a swatch ($20) to check it worked colorwise, got home and called the store to check they had it in stick. Went over and told the assistant that we'd take a 3' x 5" (advertised price $179, $129 on sale) and a 5' x 8' ($479, $299 on sale). So she kind of fussed around a bit and kept telling us we'd ordered the 8' x 10'. And then rang it up saying "OK, the 3' x 5' is $69 and the 5' x 8' is $129." I thought maybe there was another discount that we hadn't seen as there were 50% off signs all over the store. Then she kind of paused and chatted with a colleague and the colleague said "no, if you told them that then you have to charge them that" so I guess she did get confused and we got the $179 rug for $69 and the $479 rug for $129. 2 rugs, value $660 for $198 (a 70% saving). Pretty soon we'll have saved enough on dings and screw-ups to make ordering the induction stove top a "push"!!

There was one other nice deal we got but I can't remember what it was.

Still to do:
- Desqueak the sub floor (us)
- Lay hardwood floor (us)
- Finish hardwood floor (us)
- Sheetrock/mud/prime (Adelson)
- Paint the bits that show - ceiling and backsplash (us)
- Have Ray (HVAC guy) come and install duct for toe-kick register
- Pick cabinet installer (Briganti or MPR)
- Get cabs and appliances delivered
- Get cabs/appliances installed
- Decide if we really do like that cabinet hardware we ordererd. (I do, Bob is not so sure.)
- Take moment to stand back and admire sexy cabinets and applaud/breathe out!
- Call countertop guy to come and measure
- Call electrician (needs to install outlet in end of 'L', put in boxes for appliances and finish up)
- Measure and buy sink
- Countertop guy installs counter/sink/stove top
- Take moment to stand back and admire sexy kitchen and applaud/breathe out!
- (Hope that this is it) Oh wait ... un pack all kitchen crap back into new kitchen including Bob's birthday All-Clad pan set - nice!

Somewhere in there I'm sure there's one or two more sign-offs from the inspector.

Tuesday, August 14, 2007

Year 2 - Day 201


Before


After - New Window R.O is boarded up with primed plywood 'til the window arrives.


Crikey. Using all my childhood years of Erector set experience, Crossword puzzling, Sudoku mashing and any other problem solving skills (or was it just blind faith?) I finally tackled moving the living room window. It took 2 days to work up the courage and the plan. Gotta say the SawzAll, the Miter Saw, the Circular Saw and the PowerDriver have more than earned their keep. Prize for best $12.96 ever invested goes to the meek Stanley Super Pry Bar.
I still went to bed hearing every creak of the house and wondering if it was about to all crash to the ground. Just need to frame in the sill plate.

Yr 2, Day 201


Before


After


Crikey. Using all my childhood years of Erector set experience, Crossword puzzling, Sudoku mashing and any other problem solving skills (or was it just blind faith?) I finally tackled moving the living room window. It took 2 days to work up the courage and the plan. Gotta say the SawzAll, the Miter Saw, the Circular Saw and the PowerDriver have more than earned their keep. Prize for best $12.96 ever invested goes to the meek Stanley Super Pry Bar.

Sunday, August 12, 2007

Year 2, Day 199


So, it has been a while again but not for lack of being busy. Cabinets and appliances are ordered. Heating ducts are done. Plumbing is done until cabs are in. Electrical is 80% done and only stopeed because couldn't get a frigging carpenter to return my call so Bob and I are blocking up and moving the windows. We almost killed each other yesterday - not literally but he wanted to go out to dinner and the project wrecked it.

So today he left for LLWS and I got on with stuff - removed the "thermostat" column as we call it and installed the joist hanger. Bit of a precaution as the beam is built into the chimney column but for $5 for the hanger and a box of nails I consider it a bargain. Of course it wasn;t straight forward. I took off the remaining top plate of the wall we removed and it was hiding a double joist. So there was a double joist up to one side of the beam at 90 degrees a joist and then a single beam on the other. So I blocked out the single side and installed the hanger. When the inspector comes I'll have him look at it again.

With the column removed I could remove the stud at the wall junction so that I can block it and line up the outside corner for drywall plus I learnt a dandy way to get the toenailed nails out so that then you just lean the stud over and it pulls off the nails at the top plate. So now the kitchen looks even more vast (it got considerably vaster Friday p.m. when I took up the linoleum and plywood subfloor (revealing the original subfloor - nice long boards - on the diagonal - good quality stuff).

Then I turned my attention to the window to be blocked up - it was quite easy - three studs cut and inserted into the opening lined up with the joists above. Then I checked if the 2 pieces of OSB left by the roofers from last Fall were big enough and together they fit the space perfectly with out cutting - very wierd. Like they had just been sitting ont he porch waiting for that moment. Then ran to Lowes for some black tar paper - that is up and at least that window is good. I will check with Mac at work - do a quick framing consult with him on the other more involved window project and then the electrician can come back. Once that is finished the inspectors can come and do their thing and I can repair and lay the floor.

Cabs and appliances should be here within 2 wks so need to hussle. I am enjoying working on the house but not fitting it around work. It;s slow right now at work so potential to leave early exists which gives me longer evenings but nothing beats a asolid two0day weekend working on that stuff.

Laters.

Friday, June 29, 2007

Year 2 - Day 125


Year 2 - Day 125


Year 2 - Day 125


Year 2 - Day 125

Gawd, it's been so long since I blogged. I feel bad. However it has been projects that has kept me from blogging. Today I can say that IT HAS STARTED. By it I mean the kitchen remodel. We started working on the plans and shopping and thinking and measuring last Summer thinking it would be done in late Summer, maybe by Xmas. Then it got put off as my mum and Jim accepted our invite to come stay for Xmas so we delayed (and did the family room reno' instead.

So ... we have gone through many layouts and cabinet shopping and appliance shopping (until I saw the Electrolux Icon line and knew that was what I HAD to have.)

Couple weeks ago we took out a wall and a base cabinet so that we could move the heating ducts and get them upstairs into the MBR/DR extension that only had baseboard electric heat. Then last weekend after our week of vacation bliss we took down another wall cabinet and demo'd the wall and closet between the kitchen and the living room. Our pokey little 11' x 9' kitchen space is no more - you could drive a large car through there now.

Last night we removed some more plasterboard so that the ADT guy could move the alarm box that was previously in the closet. We are getting very good at removing the plasterboard without making too much dust and debris.

Then Gil our cabinet guy called today and came over to do the final measure. We are going to meet with him tomorrow mornign for a final going over and place the cabinet order and then go to the appliance store and order the dreamy Electrolux icon stuff - can I handle dropping $20,000 in one weekend?? So the kitchen re-do is off and running.

Thursday, January 25, 2007

Wednesday, January 24, 2007

Day 335 - Jan 24 - Faux Brick (on brick!) Finish


Slowly getting back into some projects after a lull over Xmas. Have mainly been concentrating on the kitchen project but last night I took on the brick surround on the fireplace (yet again). Last effort was four coats of paint stripper and no brick in sight.
I headed to Lowes and got some heavy duty (50) sand paper for the Mouse and also a bunch of brick red paint swatches. I sanded the brick a bit ad results were mixed - some of the paint came off easily but some was on there for good so I decided I have to do the faux paint. Back to Lowes but this time I had matched the swatches to the actual brick tones and bought 3 sample pots of paint ($3.98 each and a "pouncer" brush to stipple - couldn't bring myself to drop $15 on a sponge). The mid color that I painted on first was American Century Tropical Nut, then a stippling of the just slightly darker Cliveden Henna Red and then a stippling over that of a slightly lighter color - Florentine Clay - that I softened and dispersed a lot more with the brush to get that kind of effervescence white sheen that you get on bricks.
I think the results were pretty good - the flash doesn't help the photo. I painted on the medium shade first and then stippled the darker tone on top and then stippled the lighter tone over that being sure to really work it so that it looked like a soft smudge and not edgey. The samples only came in satin but I didn't want to buy a quart of flat so I might have to hit it all with a matt clear top coat. Just need to go back tonight and get a cement color for the mortar and then I can start priming/painting the mantel/wood surround.

Went back to Lowes tonight with another matching color swatch but wanted to check if there was any ready-made mortar in a tub that I could use as the painting was going to be a pain. Luckily Lowes had Quikrete Textured Mortar Repair ($1.99) - think grey bath caulk with sand and grit in it. So I just smoothed that on with my fingers in to the mortar groove and wiped off the edges of the brick and I think it looks fab. It really needs a wash coat to cut the new and clean look, to give it a bit of grime so I will have to look into that but apart from that it was a much easier, quicker project than I had anticipated.

Wednesday, December 20, 2006

Day 300 - Family Room and Guest Room done


BEFORE

AFTER

BEFORE

AFTER


Even though Smith & Noble screwed us royally on our blind order - they had the order for over a month and would call us every week with problem after problem - "this not available", "this blind's too heavy to build this way", "this valance is out of stock", "well now we can't get it to you for christmas even if we didn't have any problems" - that in the end we cancelled so we have temporary paper blinds up in the FR. However, bar hanging a few pictures and adding a few accessories and shelves, the FR is done and the guest room is done. My mum and Jim arrive tomorrow. Sweet timing and appropriate to celebrate our 300th day in our own property.

Wednesday, December 06, 2006

Day 286 - Family Room update


Still waiting on the carpet for the family room but it has come a long way since the dark gloom of brown plywood. Also need to add second coat of prime to stained wood window frames (yuk!) and then gloss. Once the carpet is in and the furniture is back it will look fab - and hopefully all in time for Chrimble.

Saturday, December 02, 2006

Day 282 - The Fireplace Surround/Mantel is done!


It's done - Bob will have somewhere to hang his stocking. I bought the lumber for everything but the pilaster molding and top and bottom blocks - that came as a pilaster kit from Lowes (?). I got some good guides to how to do the structure from here

http://www.diynetwork.com/diy/hi_fireplace/article/0,2037,DIY_13914_2269267,00.html

and here

http://www.taunton.com/finewoodworking/pages/bw0011.asp

and here

http://www.doityourself.com/stry/buildfireplacemantel

Thursday, November 02, 2006

Day 251


Phew! The family room is coming along. Spent the last month or so making decisions on the ceiling and generally getting ready for the drywall guys: removing and replacing insultation, Bob did a great job moving outlets and wiring the speakers and cable into the wall. Then I moved a heating vent as didn't want to do the flooring and then move it. We had to abandon the beadboard planking above the joists. I had primed a few of the rafters and mocked up the plan with some beadboard planking and it was going to be a lot of money and I wasn't convinced withe the lumber that was in the ceiling (overlapping joists and trusses that overlapped the joists not butted to them) that it would look really as good as we wanted. So the ceiling is getting sheetrock and the far wall will be 1 x 6 beadboard planking.

The barely english-speaking drywall guy came yesterady with a buddy and hung and did 2 coats of mud and the room is looking great. The dimensions of it seem to have changed - especially now that there's a ceiling when we had the rafters open for a couple weeks. Once the beadboard is up on the 4th wall it should come back into the shape we remember. 3rd coat of mud today, sand and 4th tomorrow and prime on Sat and then the guys will be done. Then we just have to paint and solve the problem of choosing flooring - hardwood (like the rest of the house) or carpet. Ten we can get our house back as most other rooms have stuff from the FR and the large furniture is crammed into the living room. Didn't seem to bother Bob though, he was sitting in "the man chair" in the middle of it all last night watching the telly.

Friday, October 06, 2006

Day 224 - Anyone out there need 1950s Weldtex ceiling tiles


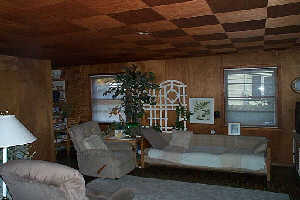
Pics are - the old family room as it was when we viewed the house with the Weldwood panelling and the Weldtex tiles. The tiles themselves with 1800 nails pulled and the ceiling I'd like to duplicate with beadboard/planking above the joists.

Yesterday Bob got the remaining Weldwood off and the ceiling tiles off before I got home. The carpenter came over with his drywall guy and we discussed stuff and learnt about the joist/roof structure. Looks like the builder built the roof structure from lumber - the joists are not single span but are bolted together mid-ceiling and the trusses overlap the joists and are nailed rather than butting and being joined with metal plates or other wood. The family room is single storey so no weight-bearing up there other than the roof structure. Offers a few challenges to our plan to beadboard above the joists. I just need to suit up and rip down the old fiberglass insulation and then pull thousands of staples and nails that still remain.
Tiles are no more - last night I pulled 1800 tacks out of about 150 Weldtex striated plywood ceiling tiles. I hate having wood lying around with nails in it. I guess I entertain the concept that someone else might be able to use them or repair another Weldtex ceiling with them - even though we don't want that "look" I am pained to just chuck them out.
Room looks kind of harsh gutted but I like to think of how great it will look finished.

Thursday, October 05, 2006

Day 223


Since the kitchen re-do has been put back to January we are ripping out the wood panelling in the family room (aka "the brown room"). We got a start yesterday morning and then I was off to work and Bob spent the rest of the day prying off trim, molding and interestingly unscrewing the electrical outlets from te panelling. They were mounted to the panelling and not the studs.

The panelling is interesting - a label on the back of one panel shows how much times have changed. It says "Weldwood Samara African Hardwood Plywood, Manufactured in French Equatorial Africa by CFG exclusively for United States Plywood Corporation. Interior grade." This label is classic 50s (the family room was added in 1955, four years after the house was built) in it's art, and also it's political and environmental incorrectness. (Love the spears, hate to think how much rain forest, albeit plantation was slashed for these panels.)
Tried to google weldwood and have found some newspaper ads from '57 and '59. I guess for that era it was all the rage which would be in keeping with our belief that the previous owners, the original and only, liked to be up with the trends of the day. Let's not forget they at one time had carpet over wide plank pine flooring over narrow strip oak hardwood flooring in the living room (the carpet wasn't there when we moved in and we pried up the pine very easily and laid and refinished it in the master bedroom.)

If anyone out there has more info on Weldwood, I'd be interested to here it just out of my interest to understand the history of the house.

Tuesday, October 03, 2006

Day 221

Yikes - not very consistent on the blog - 214 days since last post! Good news is that we have got lots done - that's basically why we haven't blogged - we have been DOING instead of WRITING! Bob has been away heaps which I like just fine as I can work until late and get lots done. Here's a quick update then I'll try to get some pics later:

Back lawn - tilled, limed, fertilized, reseeded - growing! Gurneys.com sent crappy (old) seed so they are sending more but it's starting to get to 40s overnight so the overseed may have to wait til April. 80 ft tall trees trimmed back away from the roof and to get more sun into the back.
Front lawn - city dug up to replace a burst water main (our first) then spread crappy top soil full of purslane. Huge yew bushes are yanked and I have reseeded 10 ft of the front border and edged, gravelled and reshaped that. Moved the azalea from the side to hide the a/c unit. Tilled parts of the lawn that need it and limed, fertilized, reseeded - it is just popping it's fine green little blades out of the soil. Ripped out the ground cover ivy and took down a few crap trees on the side area (no the side lawn - that seed is up too - Scott's comes up super fast - which makes me suspicious of them - do they put something in it so you get quicker results?). Driveway has 24" band of pond stone to widen it and top end of side lawn is ready to be converted to a parking spot.
LR - ceiling, walls, trim (except fireplace baseboard) painted. French door hung. Floors finished. Currently full of all the FR furniture too as we get ready to drywall in there. Have already down 3 paint stripping coats in the fireplace brick and have finally made progress - really want to get that done to the bare brick before we build the mantel. Bob has replaced the outlets/plates - they look fab and really finish the room off.
FR - still the brown 70's nightmare. Everyone loves the wood ceiling tile but we can't think of a way to keep it and change the room so we're going to take the tile off, rollup the insulation in the roof space, remove the sheathing under the tiles and put 2.5" beadboard-style (altho not as narrow as beadboard) above the roof joists then paint it all white. We are having a practise go in a small area to see how it will look as it will effect the cost of the drywall job (they'll have to cut the drywall around the joists and the floor to beadboard height will be more than 8'. The switch to the outdoor porch is now on a remote.
K - the kitchen re-do planning was in full swing when my mum accepted our invite to come over for Christmas from the UK so we're still working on quotes and planning etc as we have to redo everything but we'll start the work in January. Have found a great carpenter and have a couple drywall guys coming to give quotes. We have been talking to Kingswood kitchens whose factory is just about a mile down the road and really like the Bosch appliances. Trying to get quotes done so I can get the permit app in.
DR - painted (not the trim we left it bare). Chandelier hung and old hole patched - I am getting good at them thanks to TOH magazine.
Office - status quo, except now it is all Bob's domain as I moved my computer upstairs.
MBR - this along with MBR2 is on the verge of being the first truly finished room, all painted, curtains hung, Bob sprayed the louvre closet doors this past weekend. I just need to paint the dreaded window and roller the doors. Bob replaced allthe outlets and plates so everything is pristine white and sharp. Looks great. One outlet is remotely operated from a switch at the doorway.
MBR2 - likewise - just the doors to roller and that's it. My computer and desk are now in this room. Need to buy the Mac Mini so we can go all wireless - I am the last hard-wired holdout. Same with the outlets/plates.
MBA - recessed light installed over the sink and in the shower so we can see! Bob has spray painted the insides of hte cabinets and the doors - they look great. This room will look fab with some fresh white ceiling paint and a medium green on the walls to work with the existing small tile floor and green mid-60s formica worktop. It will actually look OK and will tide us over until we redo this room.
Workout room - status quo
Guest room - mother's trip has brought this to the "get done by Xmas" list. We bought paint last week and I'll get this done on one of Bob's next trips away. One outlet is remotely operated now form a switch by the door.
Hallway and front BA - status quo. Oh, except Bob bot a nice curved shower rail and we hung a curtain.
Attic - I cut access as there was none - more to check out stuff. Space is remarkably good, dry, clean shape. Joist bay insulation looks like paper covered brown sawdust - house inspector says it's probably not asbestos but to always assume that it could have some in it but didn't see anything white. Seeing which way the joists went and the fact that they were split on the center wall helped me figure out that the kitchen wall we need to remove is not load-bearing as the city inspector said. I've called him and he'll come out and look again - I also cut holes in the ceiling to see the joists running parallel to the kitchen wall.
Basement - I measured all the floors and measurements to all the ducts and vents and drew them and overlayed them to find out where our ducts go - there is none in the wall we're taking out in the kitchen but one in the closet wall which will change the kitchen design a tad. Very interesting mystery to solve where all the ducts springing out of the furnace like methusala actually end up.
New hot water heater. We had the electrical upgraded a bit - there was already a 200A panel but the original fusebox was still in play so we had that replaced with a 100A panel.

I've probably missed a few things. We've been busy that's for sure and now when we show friends around the house we are beginning to realize how much we have achieved in 6 months.

Ok - I gotta go do some work now. We still love the house - even more now. We had our first fire in the fireplace on Friday as the fall chill moves in.

Saturday, March 04, 2006

Day 7


Another busy day. The floor guy was in finishing laying the MBR floor and beginning sanding. Bob and I went and bought a washer and dryer courtesy of his Mum - thanks Annie! We picked up a Frigidaire floor model reduced from $699 to $519 - nice EnergyStar front loader and the matching dryer. We'll get a further $40 back on the washer through EnergyStar/local electric co. CL&P. Also ran to the local recycling/trash center and our favorite paint store- Ray Roth's.
Bob and I took up the linoleum in the hallway to reveal more wood. The part right by the front door was damaged a while ago by a pipe burst so we will take that part up and lay a slate tile or something (Ed. - we laid more hardwood) on about 9 sq. ft. but now we have oak floors all the way from the living room across and up the stairs so it's looking a lot cleaner lined. We pulled all the nails out of the floor for Tom.
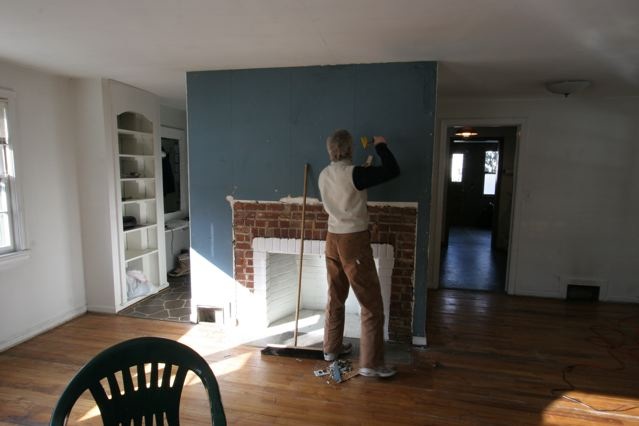
Last night while I was at work Bob demo'd the DIY fireplace mantel, surround and textured wood panelling to reveal some lovely 1950's grey blue wallpaper. Pulling off the panelling left some big nail holes in the plaster but really cleaned up the fireplace area. Bob just wanted to sheetrock over it but I wanted to give it a go stripping and spackling. The guy at Ray Roth's sold us a wallpaper perforator and a product called DIF - something to break down the glue.
So I scored and soaked and soaked and soaked and then the paper came off like slicing cheese - nice! While I did that Bob put in a programmable thermometer.

Day 6


Among other things - Bob demo'd the fireplace mantel and wood panelling leaving behind many nails to be pulled. A pattern is establishing that he is the advance party and I am clean-up - how did that happen?

Wednesday, March 01, 2006

Day 5


Don't forget to floss!